Objectives can be tricky to place, as they rely on a variety of factors in both your army and that of your opponent. A few tips apply to every objective game:
- Can he Outflank? If so, consider placing your Objs closer to the midline of the table.
- Can he Deep Strike? If so, remember the castling principles outlined in previous posts and consider placing your Objs near impassable terrain or board edges. Even if you kill the embarked unit in a pod, killing a 12/12/12 vehicle is a headache you should avoid if you can, by making sure he can't drop the pod itself within contesting distance.
- Are you a shooting army? Put the objectives that are NOT in your immediate deployment zone in the open, so you can shoot freely at any units trying to take them. Objs in your zone should be in cover so you take minimum return fire, and can strike before attackers who don't have Frags.
- Are you a combat army? Put all of the objectives in/near cover (you have Frag Grenades, right?) so when you win combats, you don't get shot up too much by the enemy. The exception to this is cover big enough to hide vehicles - you don't want to cripple your own fire support by giving enemy transports/tanks free cover saves.
Capture and Control
Otherwise known as "Oh, look ,we rolled a draw". The trick with this one is making sure you extend enough to reach out towards the opponent while also leaving enough behind to defend your own.
The key thing is not to fight on your own objective. If you're embroiled in a swarming melee on top of your objective with transports and stuff cluttered around the outside it can be very hard to claim it without contesting enemy units. Fight a good 12" away from it if you can - use blocking techniques and terrain to control enemy movement to the best of your ability.
Also try to shut down enemy mobility as early as you can - transports, skimmers and jetbikes especially. With that in mind, the best placement for your own objective is generally at the back of your firebase. If you have a nice ruin or hill in your deployment zone, put the Obj at the back of it. Your fire support elements plus at least one Troop choice can then sit on that nice piece of cover with decent sight lines. If no such terrain piece is available, then make the most of available cover or use your own vehicle hulls to give you cover saves on things like Broadsides or Devastators.
The REST of your army should then make it their mission to control the middle of the board until about turn 4. Note that you should not grind mindlessly towards his objective every turn - you should reach the middle of the table, occupy it, put out some damage, and THEN go for it one or two turns later. This confers several advantages:
- You can turn around and go back if you really need to with one or more units, such as when your home Troops choice has their transport explode, fail their morale, and flee off the table.
- You can react much easier to your opponents moves with more of your units. If you run at him with everything then it's quite easy for him to flank you with a fast unit or two that can cross the table and reach your objective.
- You are not moving so fast, so you can put out more firepower - moving 6" instead of 12", staying stationary for a turn or two, not having to run, etc. In the long run this will mean you have a better chance of controlling his objective and defending your own because he will have less resources available to him to do the same to you.
- It means most of the combats will happen mid-table instead of in someones deployment zone, which we have already established is a bad thing.
Seize Ground
D3+2 Objectives, with the common Tournament pre-set being the maximum of 5. If 3 is rolled, it basically becomes Capture and Control except normally one player has two Objs in his deployment zone instead of one. The same principles apply for both 4 and 5 Obj games, which are as follows:
First, ask yourself a couple of questions in addition to the ones at the start of this post.
- Am I/my opponent a "Rock" army? The definition of a Rock army is a list that relies on one or two super-units to do most of their heavy lifting with regards to killing the enemy. 10 Nobz + Warboss + Toys fit into this category, as do large squads of Terminators, Paladins, Multiple Land Raiders, etc etc. If a unit (including their transport if they have one) cost more than 500pts, it's probably a Rock. Generally melee orientated and very survivable.
- Am I/my opponent an MSU army? MSU stands for "Many Small Units" and is generally the antithesis of Rock lists. 5 man squads in Razorbacks (or the equivalent) or minimum sized units with heavy/special weapons generally provide the building blocks of MSU. Space Wolves, Grey Knights and Necrons are the worst offenders, although any army can do it if they try.
Rock armies want the objectives to be bunched up as much as possible, because it means they can march their badass units into the middle of them and sit there, daring anyone to come close enough to assault. A Land Raider claims two objectives if they are 12" apart and it sits in the middle. 10 Terminators can easily claim 3 if they are placed in a 12" triangle. The unit doesn't even have to be Troops, they just have to deter enemy units and assert control over the area.
N.B. Even though you deploy objectives before the roll to choose sides, it is extremely common for someone to pick the side they are stood on in casual games (and even in tournaments), and deploy objectives and choose zones appropriately. While it *should* be impossible to determine which zone your opponent will choose before the roll itself, it is often rather easy to do so. Whether you choose to factor this into your thinking or not is entirely up to you.
Here is an example of how you might place the Objs if you have a rock army with shooting support:

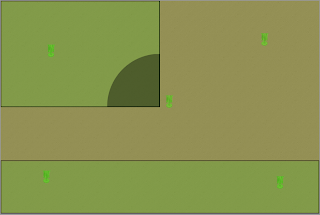
Here is an example of how you might place the Objs if you're a pure melee army:

Again, assuming you are in the bottom/left it means you can advance with your entire army, with no need for any kind of back-field objective holders. You run as fast as you can at the enemy and essentially play as though you're going for Kill Points - wiping him off the table if possible. Failing that, you should have penned him in enough with your rock unit(s) to be able to splinter a scoring unit off towards one of the outer objectives, and contest the rest. If he splits his army it just makes killing him that much easier, and you roll over the trio of Objs with your rock and your scoring units.
MSU armies play entirely differently. Regardless of who deploys where or whether you're ranged or melee, you will most of the time be aiming for something like this:
Commonly it is the objectives deployed closest to the centre of the board where the fighting takes place, so that is where you should concentrate most of your army, sending a few other units out to the more remote objectives, forcing your opponent to split off more of his army to do so. If your opponent is forced to send a 200pt unit after your 100pt unit, that's ideal for you, because every unit sent out that way significantly weakens his centre, while yours barely notices the loss.
Space marines are generally good at this, as they can combat squad as needed, turning 3 scoring units into 6. Park 4 marines plus a missile launcher on each corner objective while the Sergeant and Flamer/Melta runs forward with the squads Razorback/Rhino at the opposing corner means 400pts of units can control 4 Objectives if left alone while the big scrap happens in the middle. Obviously one or more of your units will get nobbed, but if it means your opponent is sending bigger and scarier units to do it, or you're taking firepower away from your better units then that's all gravy.
A lot of choices you make will depend on both terrain and your opponent, so I'm afraid this is only the broad strokes of how I normally place objectives, the details aren't obvious until you are actually stood next to your table!
No comments:
Post a Comment